Key takeaways
- Aim for roughly 18g of grounds in, 36g of espresso out, in about 25-30 seconds - that's your starting target, not a law.
- Distribute and tamp level with around 30 pounds of pressure; consistency matters more than crushing force.
- A gusher (under 15 seconds) means grind finer; a slow drip (over 40 seconds) means grind coarser - change one thing at a time.
- Your first shot will probably be sour or harsh. That's normal. Three or four dialed-in shots later, it gets good.
- Weigh everything with a $25 scale from day one. Guessing by eye is the fastest way to a bad cup.
The first shot I ever pulled tasted like someone had squeezed a grapefruit into battery acid. I was 22, standing over a secondhand Gaggia Classic in a cramped apartment kitchen, absolutely certain I’d done everything right.
I hadn’t. But I also hadn’t done anything wrong – I’d just skipped the part where you accept that the first one is practice.
So before you pull yours, let me set the frame honestly. We’re not chasing a perfect cup today. We’re learning the physical choreography of grind, dose, tamp, and pour so your hands know the shape of it.
What You Actually Need On The Counter
You can pull a real shot with less gear than the internet suggests. But a couple of items are non-negotiable, and one of them surprises people.
A scale is the surprise. Not a fancy one – a $25 kitchen scale that reads to 0.1g is plenty. Weighing your dose and your output is the single biggest jump in consistency you can make on day one, ahead of any machine upgrade.
- A pump espresso machine (Gaggia Classic, Breville Bambino, or similar entry model)
- A burr grinder – blade grinders won’t give you an even enough particle size
- A scale reading to 0.1g
- Fresh beans, roasted within the last 2-4 weeks
- A tamper that fits your basket (usually 58mm on prosumer machines)
- A timer, or just your phone
If you’re still fuzzy on why each of these matters, the overview in Espresso for Beginners: How It All Works lays out the whole system before you commit to buttons.
Skip pre-ground coffee for espresso. It goes stale within minutes of grinding, and by the time it reaches your basket the aromatics that make espresso taste like espresso are mostly gone. Grind right before you brew, every time.
Grinding And Dosing: Where Most First Shots Are Won Or Lost
Espresso lives and dies on grind size. Too coarse and water rushes through; too fine and it clogs. You’re aiming for something like fine table salt, maybe a touch finer.
For a standard double basket, start with 18 grams of beans. Weigh it. Don’t eyeball a scoop – a level scoop of one bean can weigh 3g more than another depending on roast and size.
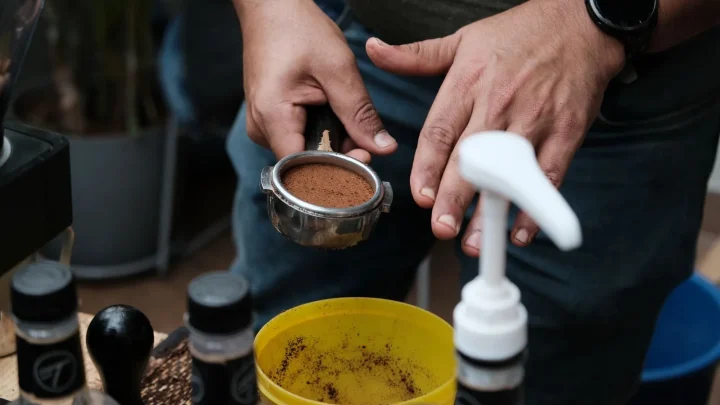
Grind straight into your portafilter if the machine allows it. Then knock the side gently a couple of times to settle the pile before you level it.
Distributing the grounds
Coffee comes out of the grinder in clumps and little peaks. If you tamp that unevenly, water finds the low-resistance path and channels straight through, leaving half your coffee untouched.
Level it with a finger drawn across the top, or a $15 distribution tool if you want. The goal is a flat, even bed – nothing fancy.
The Tamp: Firm, Level, Consistent
People obsess over tamping pressure. The honest truth from twelve years of watching people at the bench is that level matters far more than hard.
Press down with roughly 30 pounds of force. If that number means nothing to you, push on a bathroom scale until it reads 30 and memorize how that feels in your forearm. Once the puck stops compressing, you’re done – extra grunting achieves nothing.
A tilted tamp beats a weak tamp every time. Keep the tamper flat, and your first shots get twice as forgiving.
Check that the surface is even and polished-looking. A crooked puck is the number one cause of that watery, spitting shot beginners panic about.
Rest your elbow directly above the tamper and press straight down through your shoulder, not your wrist. Wrists tilt without you noticing. Elbows over the cup keep the puck flat almost automatically.
Pulling The Shot: Lock In And Watch The Clock
Now the good part. Wipe any loose grounds off the rim so the group head seals cleanly, then lock the portafilter in – snug, not gorilla-tight.
Put your cup on the scale, tare it to zero, and start the pump and your timer at the same moment. This is your first espresso shot, so watch it rather than fuss with it.
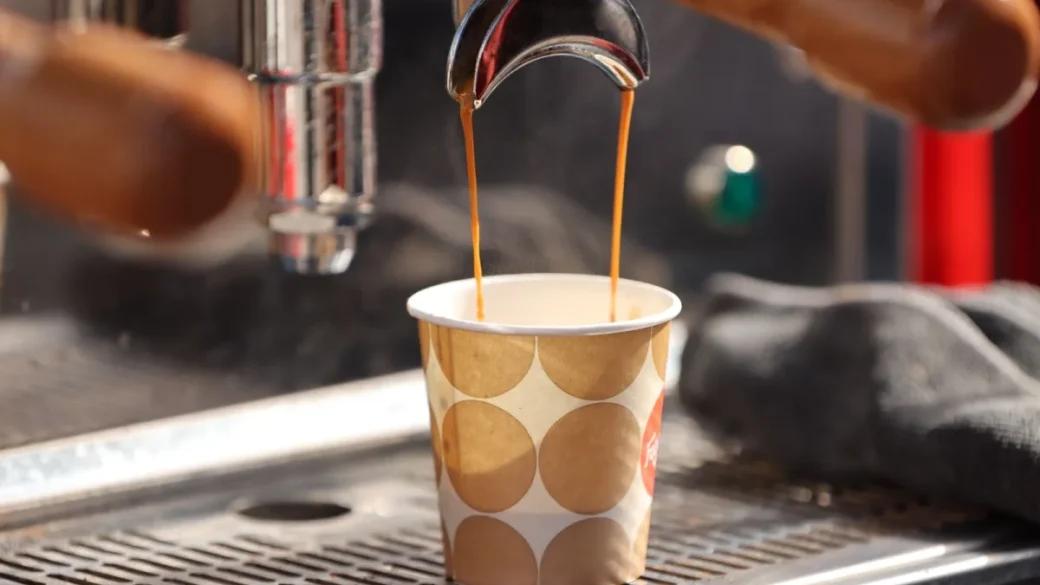
For the first 3-5 seconds you’ll see nothing – that’s the pre-infusion, water saturating the puck. Then dark drops appear, thicken, and start flowing like warm honey.
Your target numbers
The classic starting recipe is a 1:2 ratio: 18g of grounds yielding about 36g of espresso in roughly 25 to 30 seconds. Stop the pump when your scale hits 36g.
| What you see | What it means | Fix next time |
|---|---|---|
| 36g out in under 15 sec | Grind too coarse, water rushing through | Grind finer |
| 36g out in 25-30 sec | You’re in the zone | Nothing – taste it |
| Barely dripping past 40 sec | Grind too fine, puck choking | Grind coarser |
| Pale, thin, sour | Under-extracted or stale beans | Grind finer or use fresher beans |
Most machines pump at around 9 bars of pressure during this stage, which is the force pushing water through that tightly packed puck. If you’re curious why that specific number keeps coming up, what 9 bars of pressure means in espresso explains it without the physics headache. The mechanism is genuinely well documented – the Wikipedia entry on espresso covers the basic pressure-and-temperature recipe if you want the reference.
Reading The Cup: What “Good” Even Looks Like
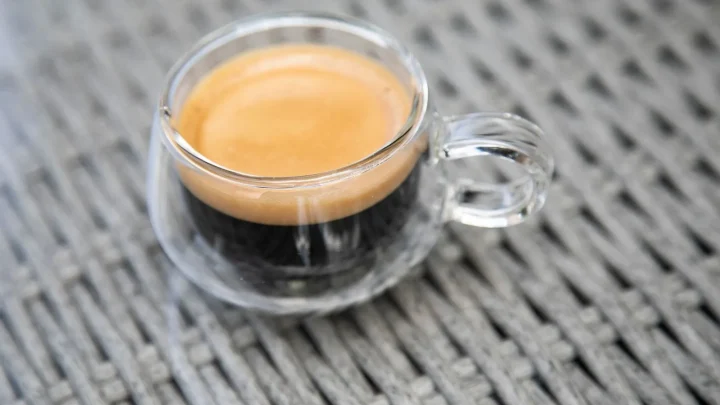
Look at the top of your shot. That reddish-brown foam is crema, and a fresh, well-pulled shot wears a layer maybe 2-3mm thick.
Crema is a sign your beans are reasonably fresh and your extraction wasn’t a disaster – though it’s not the whole story of a good shot. If you want to understand what that foam actually is, what crema is and why it forms on espresso goes deeper than “it looks nice.”
The group head and the freshly pulled espresso are genuinely hot – brew water sits around 200°F / 93°C. Don’t grab a metal portafilter by the basket right after a shot, and keep the drip tray clear so nothing tips scalding liquid toward you.
Now taste it. And here’s the honest part: it might be sour, or bitter, or oddly thin. That’s expected. A sour shot usually means grind finer next time; a harsh, ashy one means grind a touch coarser or drop the yield.
Change one variable per shot. Grind size first, always – it moves the needle more than anything else on the machine.
Where Your Fourth Shot Beats Your First
Nobody’s first shot is good. Mine was grapefruit and battery acid, remember. But my fourth that same morning was actually drinkable, and that’s the real lesson here.
Dialing in is just a short feedback loop: pull, taste, adjust grind, pull again. Give yourself a bag of beans – maybe 10 or 12 shots’ worth, about $18 of coffee – as tuition. By the end of it your hands will know the routine and your palate will know what to chase.
Keep notes for the first week. Dose, grind setting, time, yield, and one word on taste. It feels fussy, but it turns “why was that one good?” into a number you can repeat.
When you’re ready to understand the machine doing all this work, running through the espresso machine parts explained for beginners will make every adjustment from here feel less like guessing and more like tuning. That’s the point where espresso stops being intimidating and starts being a Saturday-morning ritual you look forward to.
Frequently asked questions
Sourness almost always means under-extraction - water passed through the grounds too fast to pull out the sweeter, balanced flavors. Grind a bit finer so the water slows down and spends more time in contact with the coffee. Also check your beans are fresh; stale coffee tastes flat and sharp no matter how well you pull it.
For a standard double basket, start at 18 grams weighed on a scale. Different baskets are designed for different doses, but 18g in and 36g out is a reliable beginner recipe. Once you're comfortable, you can nudge the dose up or down by a gram to fine-tune strength.
You don't strictly need one, but it's the cheapest upgrade to consistency you can buy. Guessing your dose by eye can be off by 2-3 grams, which completely changes how the shot pulls. A $25 scale that reads to 0.1g takes the biggest variable out of your hands on day one.
A shot that gushers through in under 15 seconds is under-extracted, usually because the grind is too coarse or the puck was tamped unevenly and water found a channel. Grind finer and make sure your tamp is dead level. If it still races through, check that you're using enough coffee to fill the basket properly.
Not much. A thin layer of crema tells you your beans are fresh and the extraction wasn't a total miss, but it isn't a reliable measure of taste. Plenty of great shots have modest crema, and dark oily roasts can produce lots of crema over a mediocre shot. Judge the cup by flavor first.
Usually within one bag of beans. The first shot is practice, but by the third or fourth adjustment - changing grind size one step at a time and tasting each result - most people land on something genuinely enjoyable. Keeping short notes on your dose, grind, time, and yield speeds that up a lot.