Key takeaways
- Run 2-3 tankfuls of fresh water through the machine before making any coffee to clear out food-grade grease and factory residue.
- Prime the pump before the first heat-up so you never fire the boiler dry, a fault I see constantly on returned units.
- Let the machine sit fully heated for at least 15-20 minutes with the portafilter locked in so the group head reaches temperature.
- Use filtered or bottled water around 50-100 ppm hardness to keep scale out of the boiler from day one.
- Pull two or three blank shots through the group before your first real espresso to stabilise temperature and flush the lines.
The first time I opened one of these on my bench, I did what most people do: yanked the tape, dumped the foam, and reached for the coffee. Wrong order. A new machine has food-grade grease on the seals, plastic dust in the water path, and a pump that has never seen a drop of water.
Skip the boring part and the first thing you taste is silicone. The second thing you deal with, sometimes, is an air-locked pump screaming its head off.
So here is the routine I run on every brand-new machine before it earns the right to make coffee. It works whether you bought a $200 Gaggia Classic Evo or a $900 dual-boiler Breville Dual Boiler.
Unboxing without breaking anything
Cut the tape, don’t stab it. The box flaps often sit right above the water tank or the steam wand, and I have seen more than one wand bent by an over-eager box cutter.
Lay everything out on a towel before you plug anything in. A typical box holds the machine, a portafilter, one or two baskets (single and double), a plastic tamper, a scoop, and sometimes a blind basket for backflushing.
That flimsy plastic tamper in the box is a placeholder, not a tool. A proper 58mm stainless tamper runs about $25-40 and it is the single cheapest upgrade that improves your shots. The stock one rarely matches the basket diameter.
Check the baskets against your portafilter size. Most home machines use a 54mm or 58mm portafilter, and mixing a 53mm basket into a 54mm holder is a mistake I still see on customer photos every month.
If anything rattles loose inside the machine when you tilt it gently, stop. That is usually a transit bolt or a loose fitting, and it is worth an email to the seller before you power up. New parts should not rattle.
The pre-clean nobody wants to do
This is the step people skip and then complain their espresso tastes off for a week. Factories coat seals and O-rings in food-grade lubricant, and the water path picks up fine plastic and metal dust during assembly.
Wash the removable parts
Everything that comes off gets hand-washed in warm soapy water: the tank, the portafilter, the baskets, the drip tray, the tamper. No dishwasher for the portafilter, the heat can warp the plastic handle and dull the finish.
Flush the water path
Fill the tank with fresh water, then run 2 to 3 full tankfuls straight through the group head and steam wand without any coffee. On a single-boiler machine I alternate: run water through the brew head, then switch to steam and purge the wand for 10-15 seconds, then back again.
- Hand-wash tank, portafilter, baskets, tamper and drip tray
- Fill with fresh water, no coffee anywhere near the machine yet
- Run 2-3 tankfuls through the group head
- Purge the steam wand for 10-15 seconds each cycle
- Wipe the group gasket and check the shower screen is seated flat
Yes, it uses a couple of litres of water. That water is carrying away the stuff you do not want in your cup. Understanding how the whole brewing process actually works makes it obvious why a clean water path matters so much for taste.
Priming the pump so you never run it dry
Here is the fault I see constantly on returned units: someone powered up a new machine with an empty or air-locked pump, let it run dry, and cooked the vibratory pump or the heating element. Priming prevents that.
A new pump is full of air. Until water actually reaches it, running the boiler heater is a gamble, and a dry vibe pump makes a loud, angry buzzing that tells you it is moving nothing.
How I prime a cold machine
Fill the tank fully and make sure it is seated so the pickup tube reaches the water. Turn the machine on, then immediately open the steam or hot-water valve and hit the brew switch. You want the pump pulling with an open path so trapped air can escape.
Within 5 to 20 seconds the buzzing note changes and water starts sputtering, then flowing, from the wand. That change in sound is the pump catching prime. Once you have a steady stream, close the valve and let water run from the group for another 10 seconds.
Never leave the brew switch on for more than about 60 seconds if no water appears. If the pump keeps buzzing dry, switch off, top up the tank, reseat it, and try again. Running a vibe pump dry can kill it in under two minutes, and that is a $40-70 part plus your afternoon.
Water before heat. If the pump has not caught prime, the boiler has no business being hot.
Machines with a rotary pump or a plumbed line prime differently, but the principle holds: confirm water is moving before you trust the heater.
The first warm-up, done properly
A cold group head will wreck your first shot no matter how good your beans are. The metal mass of the portafilter and brew group needs to soak up heat, and that takes real time, not the 45 seconds the ready light suggests.
Lock the empty portafilter into the group head before you start heating. It heats along with everything else and comes up to temperature with the machine instead of stealing heat from your first shot.
Give it the full soak
Let a single-boiler machine sit for 15-20 minutes after the ready light comes on. A dual boiler or heat-exchanger with more thermal mass wants 20-30 minutes for genuinely stable temperature. The light tells you the water is hot, not that the whole machine is.
Brew temperature for espresso sits around 90-96°C at the group, and that stability is what separates a sour, under-extracted shot from a balanced one. The pressure side of the equation matters just as much, which is why it helps to know what 9 bars of pressure actually means once the machine is up to heat.
While the machine warms, pull two or three blank shots, just hot water through the empty portafilter, into your cup. It flushes the lines, heats the cup, and by the third flush your group temperature has stopped drifting. I do this on every machine, new or 10 years old.
Water choice from day one
Scale is the number one killer of home espresso machines, and it starts building from the very first tank. Get this right now and you save yourself a descaling nightmare later.
I aim for water around 50-100 ppm total hardness. Straight distilled or reverse-osmosis water with zero minerals tastes flat and can confuse the water-level sensors on some boilers, so I do not recommend it neat.
| Water type | Hardness (ppm) | My verdict |
|---|---|---|
| Hard tap water | 200-400+ | Scales the boiler fast, avoid |
| Filtered tap (jug filter) | 80-150 | Fine for most machines |
| Bottled low-mineral | 50-100 | My preferred choice |
| Distilled / RO | 0-10 | Too flat, can upset sensors |
A cheap TDS meter costs about $12 and takes the guessing out of it. Test your tap water once; if it reads over 150 ppm, switch to a jug filter or bottled water for the machine and keep it there.
The Specialty Coffee Association publishes detailed water standards for brewing. You do not need to hit them to the decimal, but the takeaway is simple: moderate mineral content, low hardness, and no chlorine smell.
Your first real shot, and what to expect
Now the machine has earned it. Grind fresh, dose your double basket to around 18 grams, tamp level with steady pressure, and lock in. Your first pull will probably run too fast or too slow, and that is entirely normal.
Watch for the pour to start after 5-10 seconds of pre-infusion, then flow like warm honey. If it gushes, your grind is too coarse; if it drips to a stop, too fine. Dialing in a new machine and grinder together usually takes me half a bag of beans, so do not judge the machine on shot one.
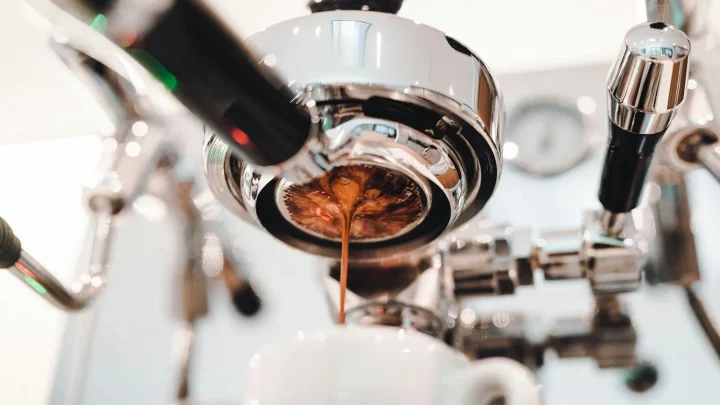
That thick, hazelnut-coloured layer on top is a good sign the setup is working. If you are curious why it appears at all, I broke down how crema forms and what it tells you in a separate write-up.
Keep this rhythm for the first week: warm up fully, flush the group, pull, wipe down, and empty the drip tray. Get familiar with the names and jobs of the main parts and troubleshooting later becomes far less mysterious. A machine that starts its life clean, primed, and properly warmed will out-live and out-perform one that got rushed on day one, every single time.
Frequently asked questions
Longer than the ready light suggests. A single-boiler machine needs 15-20 minutes with the empty portafilter locked in, and a dual-boiler or heat-exchanger wants 20-30 minutes for stable temperature. The ready light means the water is hot, not that the metal group head has soaked up enough heat.
Yes. Factories leave food-grade grease on seals and fine dust in the water path, and the first cups will taste of it if you skip this. Run 2 to 3 full tankfuls through the group head and steam wand with no coffee before you brew anything.
Priming means getting water to actually reach and fill the pump so it is not running on trapped air. A new pump is full of air, and running the heater while the pump is dry can burn out the vibratory pump or element in under two minutes. Open the steam valve and run the brew switch until water flows steadily, then you are primed.
Aim for water around 50-100 ppm total hardness, which usually means a jug filter or a low-mineral bottled water. Avoid hard tap water above 150 ppm because it scales the boiler quickly, and avoid pure distilled or RO water because it tastes flat and can confuse level sensors.
That is normal and almost never the machine's fault. A new machine and grinder need dialing in together, which typically takes half a bag of beans, and early shots run too fast or too slow until you adjust the grind. Make sure the machine was fully warmed and flushed first, then focus on grind size and dose.
You can, but it is a placeholder. Stock tampers rarely match the basket diameter exactly, which leads to uneven tamping and channeling. A proper stainless tamper sized to your basket, usually 58mm, costs $25-40 and noticeably improves shot consistency.