Key takeaways
- A tamper compresses loose grounds into a level, dense puck so pressurized water flows through evenly instead of finding shortcuts.
- Match the tamper diameter to your basket exactly: 58mm for most prosumer machines, 53mm for Breville, 51mm for many entry Gaggia and De'Longhi baskets.
- Consistency matters more than raw force. A calibrated tamper that clicks at a set pressure removes the guesswork.
- Skip the flimsy plastic tamper that ships in the box and buy a machined stainless one for $25-$45. It's the cheapest upgrade you'll make.
- A bad tamp shows up in the cup as sour, thin, fast-running shots. The puck, not the beans, is often the real culprit.
I keep a shoebox on my bench full of plastic tampers. Every one of them came free inside an espresso machine box, and every one of them got swapped out within a month by an owner who finally figured out the little wobbly disc was working against them.
People bring me machines convinced the pump is dying or the grinder is shot. Half the time the actual problem is sitting in a drawer, weighs about two ounces, and never touched a stainless workshop.
So let’s talk about the humble tamper, because it does far more than most home baristas give it credit for.
What is a tamper, exactly?
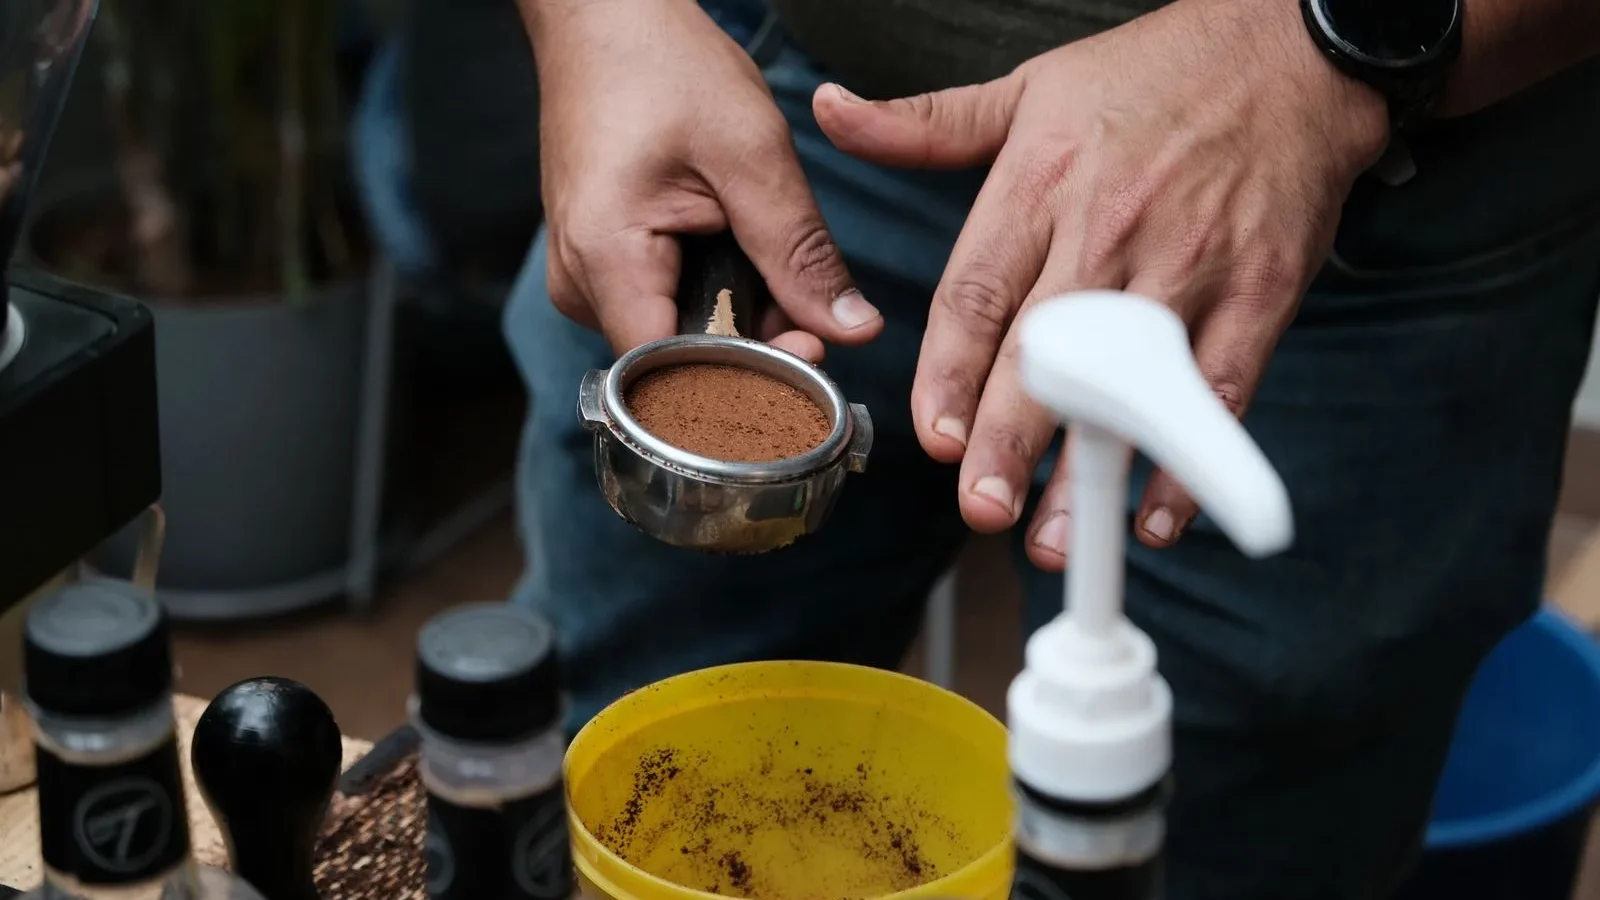
A tamper is a hand tool shaped like a mushroom: a flat metal base with a handle on top. You press it straight down into the coffee grounds sitting in your portafilter basket to pack them into a firm, level bed.
That’s the whole job. It compresses loose, fluffy grounds into a single dense disc called a puck.
It sounds almost too simple to matter. But that one motion decides whether your shot tastes like espresso or like sour brown water, and I’ll explain why in a second.
The base of a tamper is measured in millimeters and must match your basket’s inner diameter. The three you’ll meet most often are 58mm (most prosumer machines), 53mm (Breville), and 51mm (many entry-level Gaggia and De’Longhi baskets). A tamper that’s even 1mm too small leaves a gap around the edge.
Why does compressing the grounds even matter?
Espresso is made by forcing hot water through coffee at roughly nine bars of pressure. Water is lazy. Given the choice, it will always take the path of least resistance.
If your grounds are loose and uneven, the water carves channels straight through the weak spots and barely touches the rest. You get a shot that’s under-extracted, thin, and sour, and half the coffee never gave up its flavor.
Tamping fixes that by removing the gaps and the air pockets. A firm, even puck presents the same resistance across its whole surface, so water spreads out and soaks through uniformly.
Level and even beats hard and crooked every single time. A tilted puck is worse than a soft one.
This even flow is also what builds a proper layer of crema on top of the shot. No resistance, no pressure, no crema.
The word for what goes wrong: channeling
When water punches a hole through a weak spot, we call it channeling. On a bottomless portafilter you can watch it happen: a thin jet sprays sideways instead of the shot pouring down as a steady, honey-colored stream.
Nine times out of ten, channeling traces back to an uneven tamp or grounds that weren’t distributed flat before tamping. The tamper is the last tool that touches the coffee before the water does, so it gets the blame fairly often.
What makes a good tamper different from the free one?
The plastic tamper in the box has two problems. It’s usually undersized for the basket, so it leaves a ring of untamped grounds around the edge, and its base is rarely dead flat.
A proper tamper is machined from stainless steel or solid aluminum with a base ground truly flat, and it fills the basket edge to edge. You feel the difference immediately: it sits square, it doesn’t skate around, and it packs the whole bed at once.
Prices are not scary here. A solid stainless tamper runs $25 to $45, and it’s the single best-value upgrade on the whole machine.
Weigh the tamper in your hand before buying. Something in the 300 to 450 gram range lets gravity do part of the work, so you press less and stay more consistent. Feather-light tampers make you overcompensate with muscle, and muscle is where inconsistency lives.
Flat base versus curved (convex) base
Most tampers have a flat base, and for a beginner that’s exactly what you want. Some cost more for a slightly curved, or convex, base that pushes grounds toward the basket wall to fight edge channeling.
Convex bases are a fine-tuning tool, not a starting point. Get comfortable pressing a flat base level first; you can chase the fancy geometry later once your technique is repeatable.
How hard are you supposed to press?
This is the question everyone asks, and the honest answer is: less than you think, and the exact number matters less than being consistent.
The old rule of thumb floating around forums is “30 pounds of pressure.” It’s a useful ballpark, but nobody has a scale under their portafilter, and chasing a precise number by feel is a losing game.
What actually matters is that you press the same way every time. If today’s tamp is firm and tomorrow’s is gentle, your shots will swing wildly even when nothing else changed.
Never tamp with the portafilter balanced on the edge of a counter or your palm. Tamp on a rubber tamping mat with the portafilter fully supported. I’ve treated more than one bruised wrist from a tamper slipping off a wet counter, and a cracked portafilter ear is a $40 part you didn’t need to replace.
Calibrated tampers take out the guessing
If consistency is the whole battle, a calibrated tamper is a genuinely clever fix. It has a spring inside that clicks audibly once you reach a set pressure, so you stop at the same spot every time.
They run about $30 to $60 and they’re worth it for a beginner who doesn’t yet trust their hands. You press until you hear the click, and that’s it. The tool enforces the consistency your muscle memory hasn’t built yet.
Where the tamper sits in the whole process
It helps to see the tamper as one step in a short chain, not a magic wand. Grind, dose, distribute, tamp, brew. Each step feeds the next.
If your grind is wrong or your dose is uneven, no amount of perfect tamping will save the shot. The tamper’s job is to lock in a good bed, not to rescue a bad one. If you’re still mapping out how these steps fit together, our beginner walkthrough of how espresso works lays out the full sequence.
Here’s the short checklist I give every new owner:
- Buy a tamper that matches your basket diameter exactly (58, 53, or 51mm).
- Distribute the grounds flat before you press, so the surface starts level.
- Press straight down. Keep your wrist, elbow, and the tamper in one vertical line.
- Aim for level over brute force. A crooked puck ruins the shot no matter how hard you pushed.
- Do it the same way every single time. Consistency is the actual goal.
The tamper is one of a handful of tools that turn a machine into an espresso maker. If you want the full tour of the hardware, our rundown of the main espresso machine parts covers where each piece fits. And if you like the deeper history, the Wikipedia entry on espresso traces how pressure-driven brewing evolved into what we drink now.
Reading the cup when the tamp is off
You don’t need fancy gear to know your tamp is wrong. The shot tells you.
| What you see | Likely tamp problem | What to try |
|---|---|---|
| Shot pours fast and thin, tastes sour | Puck too loose, or channeling | Press a touch firmer, distribute flatter first |
| Shot drips, chokes, tastes bitter and harsh | Grind too fine (rarely the tamp alone) | Coarsen the grind before touching tamp pressure |
| One side of the stream is faster than the other | Tilted, uneven puck | Focus on pressing dead level, not harder |
| Sideways spray on a bottomless portafilter | Channeling from a gap or crack in the bed | Redistribute, then tamp square and even |
Notice that most tamp problems point back to level and consistency, not to how much you can bench press. That’s the whole lesson in one table.
The one habit that fixes most of this
If you take a single thing from all of this, make it this: throw out the plastic tamper today and replace it with a machined one that fits your basket. That $30 swap solves more shot problems than any other cheap fix I know.
After that, stop thinking about strength and start thinking about repeatability. Pick a pressure that feels firm and controlled, and reproduce it every shot. A calibrated tamper does this for you if your hands aren’t there yet.
The tamper is a quiet little tool, but it’s the last thing standing between your coffee and nine bars of water. Treat it like it matters, because the cup already knows whether you did.
Frequently asked questions
For most machines, yes. The plastic tamper included in the box is usually undersized and rarely flat, which leaves untamped grounds around the edge and invites channeling. A machined stainless tamper that fits your basket costs $25 to $45 and is the cheapest meaningful upgrade you can make.
It has to match the inner diameter of your portafilter basket, not the machine brand alone. The most common sizes are 58mm for prosumer machines, 53mm for Breville, and 51mm for many entry-level Gaggia and De'Longhi baskets. Measure your basket or check its spec before ordering, since even a 1mm gap causes problems.
Less hard than most people assume, and the exact force matters less than doing it the same way every time. The classic 30-pound figure is only a ballpark. Focus on pressing straight down and dead level, and let a firm, controlled press become your repeatable habit.
For many beginners, yes. A calibrated tamper has an internal spring that clicks at a preset pressure, so you stop at the same point every shot without guessing. At roughly $30 to $60, it removes the biggest source of new-barista inconsistency until your hands learn the feel.
Absolutely. A loose or tilted puck lets pressurized water carve channels through weak spots, so the coffee under-extracts and the shot comes out thin and sour. Before blaming your beans or grinder, check whether your tamp is level and consistent.
A flat base packs the whole bed evenly and is the right choice for learning. A convex base is slightly curved to push grounds toward the basket wall, which can reduce edge channeling once your technique is dialed in. Start flat and only try convex later as a fine-tuning step.