Key takeaways
- Distribution fixes horizontal density gaps; tamping only handles vertical. Get the puck level BEFORE you press.
- The Weiss Distribution Technique (needle stirring) beat every surface-only method in my side-by-side for stopping channeling.
- A leveling tool set to 2-3mm below the rim gives the most repeatable results for people who hate fiddly steps.
- Tapping the portafilter alone is the weakest method and often makes density worse by settling fines to one side.
- Whatever you pick, do it the same way every shot - consistency in distribution matters more than the method itself.
A customer brought me a Gaggia Classic Pro last spring swearing the machine was broken. Same beans, same grinder, same 18 grams, and one shot would gush pale in 15 seconds while the next choked to a stop. The machine was fine. His pucks weren’t.
When I pulled his basket apart, I could see it: fines packed hard on the left, a soft crater on the right. Water does what water always does – it finds the loose spot and runs straight through it. That gap between the grinds and the tamp is where most home shots quietly fall apart.
So let’s compare what actually happens when you tap, level, and spin. I ran all three through the same 58mm VST 18g basket over a weekend, and the differences were bigger than I expected.
Why distribution is a separate job from tamping
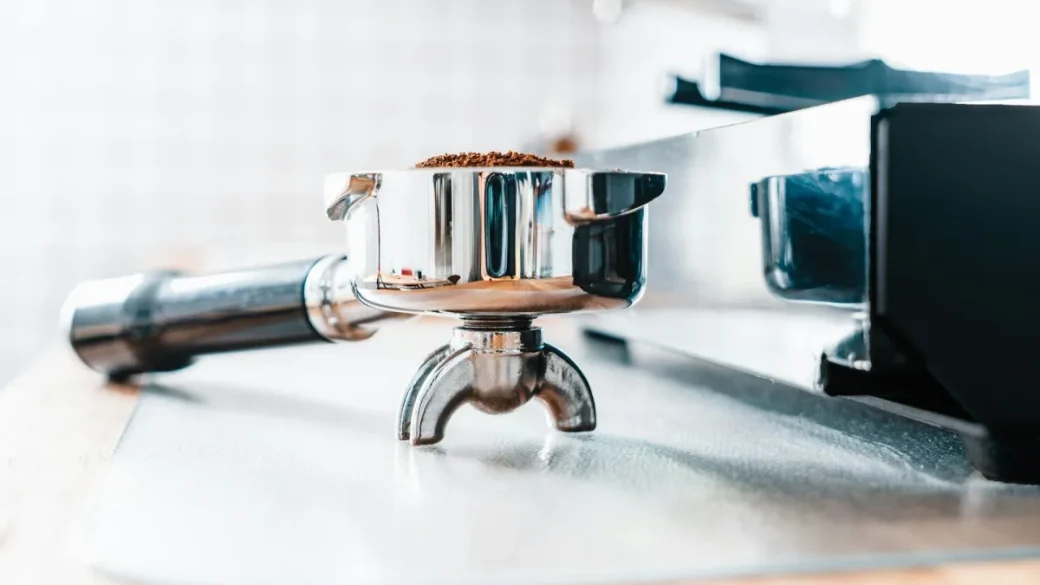
People conflate the two constantly. Tamping compresses the bed vertically – it sets density top to bottom. Distribution spreads grounds evenly across the basket so that density is the same left to right.
A flat, hard tamp on an unevenly filled basket just locks the unevenness in place. You’ve made a level lid over a lopsided room.
Tamping fixes what’s under your thumb. Distribution fixes what’s across the basket. You need both, in that order.
Grinders make this worse without telling you. Most home grinders – the Baratza Encore ESP, the Eureka Mignon, the Breville Smart Grinder – dump grounds in a mound or clump them with static. That mound is the problem you’re solving before you ever touch a tamper. The Specialty Coffee Association treats even puck prep as foundational for a reason, and it starts here.
Channeling is the technical name for water boring a low-resistance tunnel through the puck. You’ll taste it as sour and watery at once – under-extracted from the tunnel, over-extracted everywhere the water avoided. If that flavor sounds familiar, the fix often lives in what causes sour espresso shots, and distribution is a big part of it.
Method 1: Tapping the portafilter
The oldest trick, and the one I trust least. You grind into the basket, then rap the portafilter on the counter or your palm to settle the mound flat.
It does flatten the surface. That’s the trap – a flat top hides an uneven bottom.
What actually happens inside
Tapping settles by gravity, and fine particles migrate faster than coarse ones. So you often end up with fines concentrated wherever the taps were hardest, usually one side. In my weekend test, tapped-only pucks channeled on 4 of 6 shots, with flow rates swinging from 24 to 38 seconds for a 36g yield.
Firm side-taps also fracture the bed once it’s dosed, and those fracture lines become channels under 9 bars of pressure.
Never bang a loaded portafilter hard against a fixed counter edge to “settle” grounds. I’ve seen hairline cracks in cast portafilter ears and chipped spouts from exactly this. Tap gently on a rubber knock mat or the heel of your hand – the ears are the weakest part of the whole tool.
Tapping isn’t useless. A light single tap to drop the mound before you use a real distribution method is fine. As a standalone technique, it’s the weakest of the three.
Method 2: Leveling tools (the palm distributor)
This is the spinning disc you set on top of the basket and twist. Sometimes sold as a “leveler,” “distributor,” or the two-in-one distributor-tamper. Prices run from about $15 for a no-name 58mm unit to $45 for an adjustable one.
The good ones adjust for depth. You set the fins to sit 2 to 3mm below the rim, drop it on the dosed basket, and spin two or three rotations. The fins skim the high spots into the low ones.
Where it wins and where it fails
For repeatability, this is the easiest to teach. My less-experienced customers get consistent results fastest with an adjustable leveler because there’s no technique to learn – you just spin until it stops skimming.
The catch is depth. A leveler only touches the top few millimeters. It evens the surface beautifully but does nothing about density lower in the bed, so if your grinder clumped grounds at the bottom, the disc can’t reach them.
Set an adjustable distributor to 2mm below the rim for an 18g dose in a standard basket, then dial from there. Too deep and it augers grounds up the sides into a dome; too shallow and it barely touches. Mark your setting with a paint pen once you find it so it doesn’t drift.
A leveling tool is a real upgrade over tapping. It fixes surface unevenness reliably and takes about four seconds. It just can’t fix problems buried in the puck.
Method 3: The spin, and the needle method (WDT)
Two things get lumped under “spinning,” so let’s separate them.
The first is a wrist spin – you rap and swirl the dosed portafilter in a small circular motion to redistribute the mound. It’s a marginal improvement over a straight tap and shares the same flaw: it only rearranges the surface.
The Weiss Distribution Technique
The one that actually moves the needle is WDT – the Weiss Distribution Technique. You stir the dosed grounds with a set of thin needles (0.3 to 0.4mm acupuncture wires work perfectly) to break every clump and fluff the whole bed before leveling.
This reaches what levelers can’t. You’re mixing density top to bottom, not just skimming the surface. In my test, WDT-plus-leveler pucks channeled on 0 of 6 shots, and my times tightened to a 27 to 30 second band for the same 36g yield.
A WDT tool is cheap. A dressmaker’s pin cushion with sewing needles costs about $6; a purpose-built one like the Normcore or a 3D-printed handle runs $20 to $30. The needle diameter matters more than the price – anything thicker than 0.5mm defeats the point and just pushes clumps around.
The downside is time and mess. WDT adds 10 to 15 seconds per shot and a stray ground or two on the bench. For a morning double before work, some people won’t bother. For dialing in a new bag where you need every shot repeatable, I do it every time.
My side-by-side results
Same grinder (Eureka Mignon Specialita), same beans rested 10 days, same 18g dose into a VST basket, 93°C, targeting 36g out. Six shots per method.
| Method | Shots that channeled | Shot time spread | Added prep time | Cost to start |
|---|---|---|---|---|
| Tapping only | 4 of 6 | 24–38 sec | ~2 sec | $0 |
| Wrist spin | 3 of 6 | 25–34 sec | ~3 sec | $0 |
| Leveling tool | 1 of 6 | 28–33 sec | ~4 sec | $15–45 |
| WDT + leveler | 0 of 6 | 27–30 sec | ~12 sec | $6–30 |
The pattern is clear. Anything that only touches the surface leaves density problems underneath. The method that stirs the full bed wins, and it’s not close.
Tight shot times aren’t the goal for their own sake – they’re the symptom of an even puck. When your times stop wandering, your extraction stabilizes, and the sour-then-bitter split you get from channeling disappears. If your shots still taste harsh after this, the issue may be grind or ratio rather than prep, and it’s worth checking how to tame over-extracted espresso next.
How to build a distribution routine that sticks
The best method is the one you do identically every single shot. Espresso rewards boring consistency, and a repeatable routine beats a fancy technique done differently each time. Espresso itself is a pressure-brewed method that magnifies every small variable, so nailing prep pays off downstream.
Here’s the sequence I set up for customers who want the results without the fuss.
- Grind directly into the basket, or into a dosing cup and tip it in.
- Give the portafilter one light tap to drop the mound – nothing violent.
- Stir with a WDT tool: small circles, edge to center, until no clumps remain (about 8 seconds).
- Set the leveling tool 2mm below the rim and spin two full rotations.
- Tamp flat and level with steady pressure – 20 to 30 lbs is plenty; consistency matters more than force.
- Wipe the rim, lock in, and pull within a few seconds.
Dial that in and your prep becomes invisible. You stop thinking about the puck and start thinking about grind and ratio, which is where the flavor lives.
If you want the full picture of how prep feeds into the shot, our walkthrough on how to pull the perfect espresso shot ties distribution, tamp and timing together, and the piece on getting espresso grind size just right covers the variable that distribution can’t rescue you from. Fix the puck first, then chase the grind. That order has saved me more service calls than any single tool on the bench.
Frequently asked questions
If your grinder produces clumps or static - most home grinders do - WDT reaches density problems a leveler can't. A distributor only skims the top 2 to 3mm of the bed. For daily shots a leveler alone is a solid upgrade over tapping, but for dialing in a new bag where every shot must be repeatable, the needle stir makes a measurable difference.
Aim for 0.3 to 0.4mm wires; acupuncture needles or fine sewing pins are ideal. Anything thicker than 0.5mm just shoves clumps around instead of breaking them apart. The number of needles matters less than their thinness - five or six fine wires beat two thick ones.
It fixes the horizontal, density-across-the-basket half of channeling, which is the most common cause at home. It won't rescue a wildly wrong grind, an over- or under-dosed basket, or a damaged basket. Treat even distribution as the first thing to rule out, then look at grind size and dose.
Yes, as a light single tap to collapse the grind mound before you stir or level - not as your only method. Firm repeated taps settle fines to one side and can fracture the bed, both of which cause channeling. And never bang a loaded portafilter hard on a counter edge; the ears crack.
A WDT tool can be as cheap as a $6 pin cushion or a $20 to $30 purpose-built handle. Leveling distributors run $15 for basic fixed models up to $45 for adjustable ones. You can get excellent results for under $30 total, so this is one of the cheapest upgrades in espresso.
Much less. Pressurized (dual-wall) baskets create artificial back-pressure through a single tiny hole, which masks puck unevenness on purpose. Distribution technique shines with single-wall baskets like VST or IMS, where the water actually reads the puck. If you're on a stock pressurized basket, upgrading to single-wall is the change that makes distribution worth doing.