Key takeaways
- A pressurestat that cycles every few seconds or lets pressure swing wildly is usually the fault, not the boiler or element.
- Genuine CEME or MA-TER units run $25 to $45; match the differential and thread before you buy.
- Always discharge boiler pressure and unplug the machine before touching a single spade terminal.
- Set a single-boiler machine to cut out around 1.0 to 1.2 bar for stable steam without over-pressurising.
- Photograph the wiring before you disconnect anything and the whole job takes about 40 minutes.
A fault I see constantly on the bench: someone brings in a machine convinced the boiler element is dying, because the pilot light clicks on and off every few seconds and the steam comes out strong, then weak, then strong again. Nine times out of ten the element is fine. The little box sitting on top of the boiler is the problem.
That box is the pressurestat. It’s the switch that tells the heating element when to fire and when to rest, and when it wears out it either chatters constantly or lets the pressure swing all over the place.
The good news is that it’s one of the cheapest and most satisfying repairs you can do on a single-boiler machine. I’ve fitted hundreds of them, and once you’ve done one, the next takes about twenty minutes.
What a pressurestat actually does
Inside your boiler, steam builds pressure. The pressurestat has a small diaphragm or bellows that flexes as that pressure rises, and at a set point it opens a contact and cuts power to the element.
When pressure drops a little, the contact closes again and the element fires back up. That gap between “switch off” and “switch back on” is called the differential, and it’s why your machine idles with a slow, steady click every minute or two rather than a frantic buzz.
Most home machines from Gaggia and similar brands run a CEME or MA-TER pressurestat set to cut out somewhere around 1.0 to 1.2 bar. That’s the sweet spot for a stove-hot steam wand without pushing the boiler harder than it needs to work. If you want the wider context on how these parts fit together, our Espresso Machine Repair Guide: Parts & Fixes maps the whole boiler assembly.
A pressurestat is not the same as a safety valve. The stat controls normal operating pressure; the safety valve is a last-resort blow-off if the stat fails high. Both should work independently, and you never remove one to “test” the other.
How to tell it’s the pressurestat and not something else
Before you spend a cent, confirm the symptom. A failing pressurestat has a few tells that separate it from an element or wiring fault.
- Rapid clicking at idle, sometimes several times per second (worn contacts or a cracked diaphragm)
- Steam pressure that surges and fades while the wand is open
- The gauge needle bouncing more than about 0.3 bar during a normal idle
- The machine either never reaching full steam or slightly over-pressurising and lifting the safety valve
The single most common version of this is a stat stuck with a tiny differential, so it hovers right at the cut-off point and hammers the contacts on and off. You can usually hear it before you ever open the case.
Compare that to an element fault, where the machine simply never heats or takes forever. And compare it to scale, where pressure builds fine but the group runs cold. Different problems, different parts.
Tools, parts and what it’ll cost
This is a genuinely cheap fix, which is why it stings when someone’s paid a shop $120 for it. The part itself is the main cost.
| Item | Typical spec / model | Cost (USD) |
|---|---|---|
| Pressurestat | CEME XP110 or MA-TER, 1/8″ or 1/4″ thread | $25–$45 |
| PTFE thread tape | Steam-rated, thin gauge | $3 |
| Spade connectors (spare) | 6.3mm insulated | $4 |
| Nut driver / spanner set | 7mm, 8mm, 10mm | Already owned |
The one thing people get wrong is buying on price alone. A stat with the wrong differential or thread will physically fit but behave badly, so match the part number your machine shipped with, or confirm the differential rating with the seller.
Photograph the wiring with your phone before you disconnect a single spade terminal. Most pressurestats have four or more identical-looking tabs, and a swapped live and neutral will trip your breaker the instant you power up.
Replacing the pressurestat step by step
Set aside about 40 minutes for your first one. Work slowly through the electrical steps and the mechanical part is easy.
Unplug the machine and let it cool. Then run the steam wand until the gauge reads zero to discharge all boiler pressure. A pressurised boiler that’s still holding 1 bar will spit scalding water the moment you crack the stat fitting loose.
1. Get inside and find the stat
Remove the top panel or drip tray and top cover, usually two to four screws. The pressurestat sits on top of the boiler, connected by a short brass fitting or a thin capillary tube, with wires running to it.
2. Disconnect the wiring
After you’ve photographed it, pull the spade connectors straight off. Don’t yank the wires. If a terminal is corroded or discoloured, that’s a good time to crimp on a fresh 6.3mm spade.
3. Remove the old stat
Hold the brass fitting on the boiler with one spanner and turn the stat body with another. Two-spanner discipline here stops you twisting the fitting out of the boiler and turning a $30 job into a $200 one.
4. Fit the new one
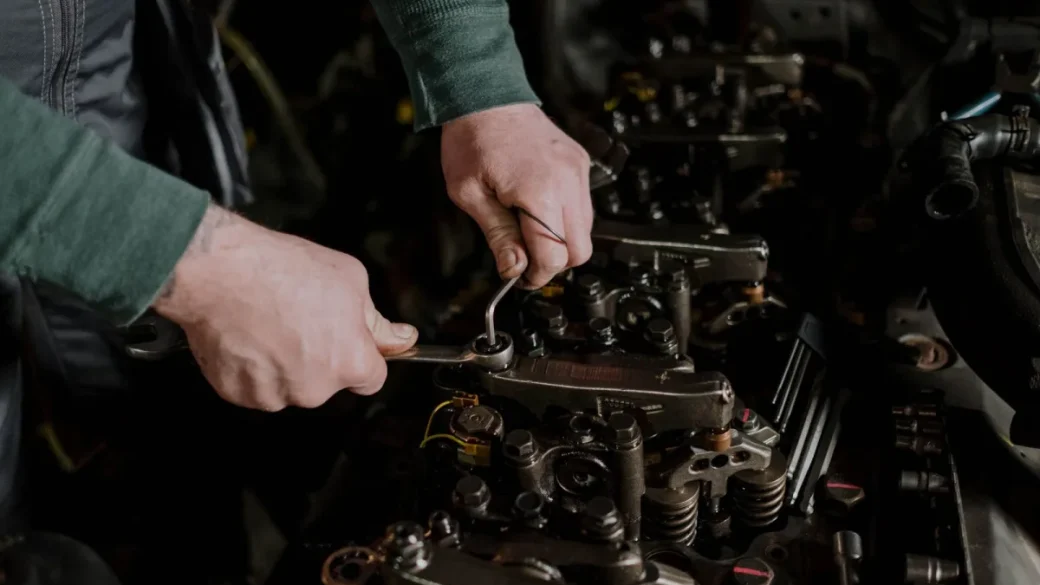
Wrap the male thread with two or three turns of PTFE tape in the direction of tightening. Thread the new stat on by hand first, then snug it with the spanner. You want it firm and leak-free, roughly 8 to 10 Nm, not cranked until the brass creaks.
5. Rewire and test
Push the spade connectors back onto the matching terminals from your photo. Double-check nothing touches the case or a bare edge, then refit the panel.
If you can’t see where a wire goes, stop. Wiring a boiler element from memory is how machines catch fire.
Setting the pressure and checking your work
Most stats ship pre-set, but they’re rarely perfect. Under the cover or dust cap there’s an adjustment screw, sometimes a knurled wheel.
Power up and watch the gauge. On a single-boiler machine you’re aiming for cut-out around 1.0 to 1.2 bar. Turning the screw clockwise usually lowers the set point, but this varies by brand, so make small quarter-turn changes and let it settle each time.
Let the machine complete three or four full heat cycles before you judge it. A fresh stat needs a few cycles to seat, and the first cut-out often reads a touch high before it stabilises. If steam is your priority, the Specialty Coffee Association notes proper milk texturing depends on consistent steam pressure, which is exactly what you’ve just restored.
Watch for leaks around the thread once it’s hot and pressurised. A tiny weep means back it off, add one more wrap of PTFE, and retighten. A steady drip means you missed the tape entirely.
When the stat isn’t the whole story
Sometimes you fit a perfect new pressurestat and the machine still cycles oddly. That’s your cue to look at the parts that share the same steam circuit.
Scale buildup can insulate the boiler and confuse the timing. Perished seals can leak pressure and make the stat cycle to compensate, which is why I often pair a stat swap with checking the O-rings and seals in the machine while I’m already inside.
And if your brew side feels off at the same time, that’s unrelated to the stat. A dripping or channeling group usually points to the group head gasket or a clogged shower screen, both of which are worth doing on the same afternoon since the machine’s already apart.
Give it a week of normal use after the swap. A healthy machine should idle with one slow, confident click every minute or two, hold a rock-steady needle, and pull steam that doesn’t fade halfway through a jug. If you get that, you fixed it right. If you want the physics behind why steam pressure matters so much to milk, the Wikipedia entry on espresso machines is a solid rabbit hole for a rainy day.
Frequently asked questions
A bad pressurestat makes the machine click on and off rapidly or lets steam pressure surge and fade, while the element usually still heats. A failed element means the machine barely heats or takes forever to reach pressure and never clicks off. If the gauge climbs to normal pressure but bounces or hammers, suspect the stat first.
For a typical single-boiler home machine, aim for a cut-out around 1.0 to 1.2 bar. That gives strong, stable steam without over-working the boiler or lifting the safety valve. Adjust in small quarter-turns and let the machine complete several heat cycles before deciding it's right.
It needs to match on two things: the thread size (commonly 1/8" or 1/4") and the differential rating. A CEME or MA-TER unit with the wrong differential will fit but cycle poorly. The safest move is to match the original part number or confirm the spec with the seller before buying.
Yes, if you respect two rules. Unplug the machine and discharge all boiler pressure through the steam wand until the gauge reads zero before touching the fitting, and photograph the wiring before disconnecting anything. The main risks are scalding from residual pressure and miswiring a mains connection, both of which are avoidable with care.
The part is usually $25 to $45 for a genuine CEME or MA-TER unit, plus a few dollars for PTFE tape and spare spade connectors. That compares to $100 to $150 at a repair shop, most of which is labour for a job that takes about 40 minutes the first time.
Check for leaks at the new thread, since a slow weep lets pressure escape and makes the stat cycle to compensate. Also look at scale buildup and perished boiler seals, which share the steam circuit and can mimic a stat fault. Let it run several full cycles first, as a fresh stat needs a few heats to seat and stabilise.