Key takeaways
- Soak seized boiler fittings in penetrating oil for 20-30 minutes and heat gently before wrenching, or you'll round the flats and crack the casting.
- A dead heating element usually shows infinite resistance on a multimeter; a healthy 1200W element reads around 40-48 ohms.
- Match the new boiler's element wattage, thread type (M14 or 1/8 BSP), and mounting stud pattern before you order, or nothing lines up.
- Torque brass boiler fittings to roughly 15-18 Nm and aluminum lower, then leak-test at pressure before reassembling the housing.
The first machine that taught me to respect boilers was a 2003 Gaggia Classic that came in “just needing a descale.” When I cracked the case, the aluminum boiler had a white crust around the element flange thick enough to scrape with a fingernail, and one of the heating-element studs had corroded down to a nub.
That job took three hours instead of forty minutes. Most of it was fighting fasteners that had effectively welded themselves shut with mineral scale and galvanic corrosion.
If you’re staring at a machine that trips its thermal fuse, never comes up to temperature, or leaks from the boiler seam, you may be looking at the same repair. Here’s how I approach it on the bench so you don’t turn a fixable machine into a paperweight.
Know Which Boiler You’re Dealing With
Home machines mostly run one of two boiler types, and they fail differently.
Brass boilers show up in mid-tier and prosumer machines. Brass handles scale reasonably well and threads hold up over years of servicing. When brass fails it’s usually the heating element burning out, not the vessel itself splitting.
Aluminum boilers are common in older Gaggia and entry-level machines. They’re cheaper and heat fast, but aluminum pits badly where scale sits, and the element flange corrodes into a mess. On those, I often replace the whole boiler assembly rather than fight a seized element in a compromised casting.
If you’re not sure what a boiler even does in the machine, a single-boiler design heats water for both brewing and steam and switches between two thermostats. That’s why a failed element kills everything at once. The general espresso machine overview is a decent primer on the layout.
Confirm the Boiler Is Actually the Problem
Before you unbolt anything, prove the fault. I’ve seen too many people replace a $60 boiler when a $4 thermal fuse was the real culprit.
Unplug the machine, discharge it, and put a multimeter across the heating element terminals. A healthy 1200W element reads roughly 40 to 48 ohms. An open reading (OL or infinity) means the element is dead.
Then check continuity from each element terminal to the boiler body. Any continuity to ground means the element has failed short and is leaking to the casing, which is both the cause of your problem and a shock hazard.
Espresso machines hold mains voltage and can store heat and residual pressure. Unplug, let it cool fully, and drain the boiler before touching a single fitting. If the element reads continuity to the boiler body, do not power the machine again until it’s replaced.
Get the Boiler Out Without Wrecking the Fittings
This is where jobs go sideways. Scale and corrosion turn every brass and aluminum fitting into a fight, and brass fittings strip if you rush them.
Free the connections first
Label and photograph every wire and hose before you disconnect it. Boilers have inlet, outlet, thermostat, safety valve, and element connections, and they are not always obvious on reassembly.
Soak the threaded fittings in penetrating oil and give them 20 to 30 minutes. Rushing this step is how people round off the flats on a compression nut.
Apply gentle heat to seized threads
For a fitting that won’t budge, a little heat from a heat gun on the surrounding metal expands it enough to break the bond. Keep it moving and moderate, and stay well away from any plastic or wiring.
Heat the metal, soak the threads, and always use a properly fitting wrench. If a fitting still won’t move, stop and reheat rather than reaching for a bigger lever.
Extract the heating element
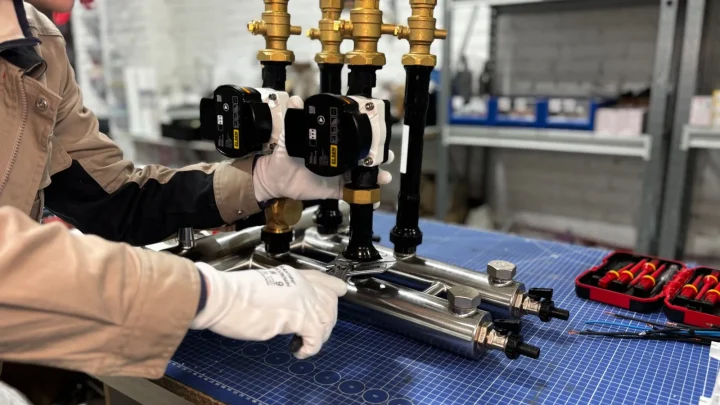
On brass boilers the element is usually a flange bolted with two or four nuts, or a screw-in element. Corroded flange nuts are the classic seizure point. Work them a quarter turn at a time, back off, oil again, and repeat.
If an element stud snaps, and it happens, you’re into drilling and re-tapping or replacing the boiler. That’s the moment to weigh a $55 to $90 replacement boiler against hours of recovery work.
Keep a small parts tray with numbered compartments and drop each fastener in as you remove it. Brass boiler nuts often come in two or three subtly different sizes, and mixing them up on reassembly cross-threads the boss.
Match the Replacement Part Exactly
A boiler that looks identical can be wrong in three ways. Get all three right before ordering.
| Spec to match | Why it matters | Typical values |
|---|---|---|
| Element wattage | Wrong wattage over- or under-heats and can trip the fuse | 1100-1400W on most home machines |
| Fitting thread | Inlet/outlet won’t seal if threads differ | M14, 1/8 BSP, 1/4 BSP |
| Stud/flange pattern | Mounting holes must line up with the chassis | 2-stud or 4-stud flange |
If you own a Gaggia or a similar single-boiler machine, cross-reference the part number against the manufacturer listing. Gaggia’s own product and support pages list boiler assemblies by model, which beats guessing from a photo.
Replacement brass boilers for common prosumer machines run $70 to $130. A bare heating element, if the boiler itself is sound, is often $18 to $45. Always price both before deciding whether to save the old casting.
Reassemble, Seal, and Torque Correctly
Going back together is where you buy yourself years of reliable service or a slow drip that returns in a month.
Replace every O-ring and gasket you disturbed. A boiler that’s open is the ideal time to refresh seals, and there’s a good breakdown in this walkthrough on O-rings and seals.
Use food-safe thread sealant or PTFE tape rated for the temperature, wrapped in the direction of the thread so it doesn’t unravel. Two to three wraps is plenty; more just squeezes into the water path.
Torque matters more than muscle. Brass boiler fittings want roughly 15 to 18 Nm. Aluminum wants less, since you’ll strip an aluminum boss long before you’d strip brass. When in doubt, snug plus a small nudge beats cranking.
Leak-test before you close it up
Reconnect the plumbing but leave the housing off. Fill and bring the machine to pressure, then watch every fitting for 10 minutes. A weep you catch now is a two-minute fix; the same weep behind a closed case is a full teardown.
- All wires reconnected to the correct terminals and photographed against your reference
- Every disturbed O-ring and gasket replaced, not reused
- Fittings torqued to spec, not “as tight as it’ll go”
- Boiler filled and pressure-tested with no weeping for 10 minutes
- Element resistance rechecked and no continuity to the boiler body
Small Habits That Keep the Next Boiler Alive Longer
Once your machine is running again, the goal is to not repeat this repair in three years. Scale is what kills boilers and seizes fittings, so the fix is a maintenance habit, not a product.
Descale on a real schedule based on your water hardness, and run softened or filtered water if your tap is hard. The Specialty Coffee Association publishes water standards worth reading if you want a target for hardness.
While you have the machine apart, it’s worth checking the parts downstream of the boiler too. If you’re already in there, refreshing the group head gasket and the shower screen is cheap insurance and saves you a second teardown next month.
A boiler swap looks intimidating the first time, but the hard part is patience with corroded fittings, not the wiring. Take the extra half hour on the soak-and-heat step, match your part carefully, and pressure-test before you button it up. Do those three things and this becomes a repair you’ll happily do again.
Frequently asked questions
Test the element with a multimeter across its terminals. A working 1200W element reads about 40 to 48 ohms, while an open or infinite reading means the element is dead. If the element tests fine but the boiler leaks from the casting or seam, the vessel itself is the problem and needs replacing.
Often yes, if the boiler casting is sound and the flange threads aren't corroded. A bare element usually costs $18 to $45 versus $70 to $130 for a full boiler. But on a badly pitted aluminum boiler with a corroded flange, replacing the whole assembly is frequently faster and more reliable than fighting a seized element.
Brass boiler fittings generally want around 15 to 18 Nm. Aluminum bosses strip much more easily, so use noticeably less and go by feel: snug plus a small nudge. Over-torquing is the most common way people crack a casting or strip threads during reassembly.
Soak the threads in penetrating oil for 20 to 30 minutes, then apply gentle, moving heat from a heat gun to the surrounding metal to break the corrosion bond. Use a wrench that fits the flats exactly. If it still won't move, reheat and re-soak rather than reaching for a longer lever, which is how flats get rounded and studs snap.
Yes. Any seal you disturb should be replaced, not reused, because compressed old rubber rarely re-seats without weeping. Since the machine is already open, it's the ideal moment to refresh boiler O-rings and any related gaskets in one go.
Scale is the main cause, so descale on a schedule matched to your water hardness and run filtered or softened water if your tap is hard. Softer water dramatically slows the mineral buildup that pits boilers and welds fittings shut, which is what turns a simple future repair into a three-hour fight.