Key takeaways
- A screen costs $6-$15 and a fresh M6 holding screw about $3 - cheaper than one bad month of channeling shots.
- Back-flush weekly with detergent; a screen that goes brown and domed is warped, not just dirty, and needs replacing.
- Torque the holding screw to roughly 2 Nm (snug plus an eighth turn) - crank it harder and you'll dish the new screen.
- Check flow with a blank shot: water should sheet evenly across the whole group, not spit from one quadrant.
The screen that ruined a customer’s morning last week wasn’t clogged. It was domed. Somebody had gorilla-torqued the holding screw over a couple of years until the thin brass disc bowed outward like a tiny satellite dish, and every shot after that fired water down the middle and starved the edges.
He’d been chasing the problem in his grinder for a month. Dose, distribution, tamp pressure, three different beans. None of it mattered, because the water was already committed to a bad path before it ever touched the puck.
That dispersion screen is the last thing water sees before your coffee. When it’s clogged or warped, nothing you do upstream fixes the shot.
Why the shower screen quietly wrecks your extraction
The shower screen (some brands call it a dispersion screen or diffusion plate) sits flush inside the group head. Its whole job is to take the single stream coming from the machine and spread it evenly across the coffee bed.
A good one distributes water like gentle rain. A bad one fires it like a garden hose with your thumb over half the nozzle.
Two failure modes account for almost everything I see on the bench. The first is clogging: coffee oils and fines bake into the mesh over months, and the open area shrinks unevenly. The second is warping, which is what happened to that customer, usually from over-tightening or thermal stress over years of use.
Espresso is brewed by forcing near-boiling water through finely ground coffee at around 9 bar of pressure, so even a small distortion in the last surface the water crosses shows up loudly in the cup. There’s a decent overview of the method on Wikipedia’s espresso page.
The tell in the cup is channeling: sour, thin, uneven shots even when your grind and dose are dialed. The tell on the bench is a blank shot. Pull the portafilter, run water, and watch where it lands.

Clean it first, or replace it?
Before you spend a dime, rule out a dirty screen that just needs a scrub. A weekly back-flush with a blind basket and a scoop of Cafiza or Puly Caff clears most oil buildup and costs pennies per cycle.
Here’s how I decide in about 30 seconds.
| Symptom | Clean it | Replace it |
|---|---|---|
| Dark stains, mesh still flat | Yes, back-flush | No |
| Screen sits domed or dished on a flat surface | No | Yes |
| Holes visibly torn or enlarged | No | Yes |
| Water still spits after two cleaning cycles | No | Yes |
The flatness test is the honest one. Pop the screen out, lay it on a granite counter or a steel ruler, and press one edge. If the opposite edge lifts, it’s warped, and no amount of soaking brings it back.
If it rocks on a flat surface, it goes in the bin. A screen that won’t sit flat can’t spread water flat.
Tools and parts you’ll need
This is a genuinely cheap repair. The screen itself runs $6 to $15 depending on brand, and I always swap the holding screw at the same time because a $3 part isn’t worth reusing once it’s been seized.
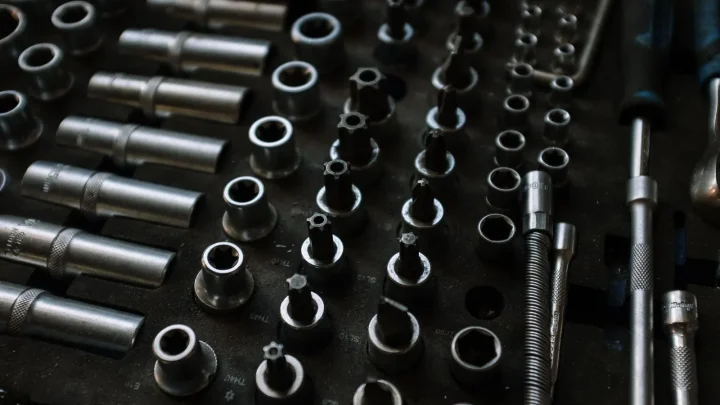
- Replacement shower screen sized to your group (58mm is standard for Breville, Gaggia, Rancilio; 54mm for many De’Longhi units)
- New M6 holding screw (usually slotted or Phillips, sometimes a 3-4mm hex)
- The right screwdriver, ideally a hollow-ground flat bit that fills the slot
- Penetrating oil or descaler for a seized screw
- A soft brush and a lint-free cloth
Measure before you buy. Grab a caliper or a ruler and check the screen diameter, because a 58.3mm screen will not seat in a 58mm recess and a 57mm one will rattle.
Not every machine uses a screw. Many E61 groups and a lot of De’Longhi and Breville models hold the screen with a snap-in ring or a threaded ring instead. If you don’t see a central screw, look for a retaining collar around the edge. Manufacturer parts pages like Breville and De’Longhi list the exact screen for your model number.
Removing the old screen and that stubborn screw
First, the part everyone skips and regrets.
Switch the machine off, unplug it, and give the group head at least 30 minutes to cool. That brass sits near 200°F in use and will blister a fingertip instantly. Never work on a hot or powered machine.
With the machine cold, put your screwdriver dead center on the holding screw and press down hard while you turn. The pressing matters more than the twisting.
Most screens release with a quarter turn counterclockwise. The screw drops, the screen comes away, and you’re looking at the diffuser block behind it.
When the screw is seized
Scale and dried coffee oil glue these screws in place. If it won’t budge, put one drop of penetrating oil or a little descaler solution on the head and wait 10 minutes before trying again.
Keep downward pressure to stop the bit from camming out and stripping the slot. A stripped screw head turns a five-minute job into a drill-it-out afternoon, and I’ve had a few of those.
Once the screen is off, wipe the recess clean and inspect the group gasket while you’re in there. If it’s hard or cracked, that’s the moment to handle it too, and I walk through that in detail in our piece on how to replace a group head gasket at home.
Fitting the new screen for even flow
Orientation counts on some screens. A mesh-type screen usually has a smoother side that faces down toward the coffee and a coarser mesh side that faces up. Fit it wrong and you can trap grounds against the diffuser.
Seat the new screen squarely in the recess so it sits flat with no lip catching an edge. Then start the holding screw by hand for the first couple of turns.
Hand-starting stops cross-threading, which is the single most common way people wreck the diffuser block. If it doesn’t spin in freely, back it out and try again rather than forcing it.
Torque, not muscle
This is where that domed screen came from. Tighten to roughly 2 Nm, which in plain terms is snug plus about an eighth of a turn.
You want it firm enough that no water sneaks around the edge, and no firmer. If you own a small torque driver, set it to 2 Nm. If you don’t, stop the instant you feel solid resistance and add the barest nudge.
A tiny smear of food-safe silicone grease on the screw threads makes the next removal painless and helps you feel true torque instead of fighting friction. One matchhead of grease is plenty for years.
Testing the fix before you call it done
Reconnect, power up, and let the machine reach temperature, usually 5 to 15 minutes depending on the boiler. Then run a blank shot with no portafilter and watch the water.
It should sheet down evenly across the whole group, curtain-like, not spit from one quadrant or dribble off center. Even flow here is the entire point of the job.
Now lock in a portafilter with your normal dose and pull a real shot. A screen that’s seated right shows up as a flatter, cleaner puck when you knock it out, with no craters or soupy patches.
Photograph the used puck. An even, dry disc means water crossed the bed uniformly. A puck with a hole or a wet quadrant tells you the screen or the tamp let water find a shortcut.
If the shot still channels after a fresh screen, the problem was never the screen and lives elsewhere in the group. Worn seals are a common culprit, and the fixes in our walkthrough on replacing O-rings and seals in your machine often solve the last of it. Weak or uneven pressure points instead toward the pump, covered in how to replace a vibration pump.
Keep the new screen flat for years
A fresh screen isn’t a one-time fix if you treat it the way the old one got treated. The maintenance is boring and it works.
Back-flush once a week with detergent, wipe the group after every session, and never over-torque that screw again. Do that and a quality screen lasts three to five years easily.
I mark the swap date with a paint pen on the inside of the drip tray, because memory lies and a dated note doesn’t. When you’re chasing a shot that’s gone flat two years from now, you’ll know whether the screen is a suspect or in the clear.
For where this fits among the other repairs that keep a home machine pulling clean shots, our espresso machine repair guide covering parts and fixes lays out the whole map. This screen swap is one of the highest-payoff jobs on it, and one of the easiest to get right once you stop treating the screw like a lug nut.
Frequently asked questions
Most home machines need a new screen every three to five years if you back-flush weekly and don't over-tighten the screw. Replace it sooner if it warps, tears, or keeps spitting water after two cleaning cycles. Cleaning handles buildup; only physical damage forces a swap.
No. Cleaning removes oils and stains but does nothing for a domed or dished disc, because the distortion is in the metal itself. Lay it on a flat surface, and if any edge lifts or it rocks, it's warped and has to go. A screen that won't sit flat can't distribute water evenly.
Measure the screen diameter with a caliper or ruler before ordering. Many Breville, Gaggia, and Rancilio groups use 58mm, while a lot of De'Longhi machines use 54mm, but there are exceptions. A screen even 0.3mm too large won't seat, and one too small will rattle and leak around the edge.
Put one drop of penetrating oil or descaler on the screw head and wait about 10 minutes. Use a screwdriver that fills the slot completely, press down hard to stop it camming out, then turn. The downward pressure matters more than force, and it's what keeps you from stripping the head.
Aim for about 2 Nm, which is snug plus roughly an eighth of a turn once you feel resistance. Over-tightening is the main cause of warped screens, so stop as soon as it seats firmly. A small torque driver set to 2 Nm takes the guesswork out entirely.
If a fresh, flat screen doesn't fix it, the water is finding a shortcut elsewhere. Check the group gasket and seals first, since worn ones let water bypass the puck edge, then look at pump pressure if flow feels weak or uneven. The screen is only one link in the chain.